
[What is a branching scenario?]
The process of creating a branching scenario in PowerPoint does not require a high level of technical ability in the use of PowerPoint. It requires the ability to create new slides, add text and where necessary pictures to the slides, and create hyperlinks that point to other slides in the PowerPoint deck.
The most challenging and time-consuming process is in the authoring of the branching scenario script. Firstly, this requires some creative imagining as to how the scenario will unfold – and then writing this narrative; secondly, careful planning in terms of mapping how the learner will navigate through the resource based on their choices. It is also important to bear in mind how quickly a branching scenario can become very complex. Given the logarithmic scale of branching systems, careful planning is required to ensure that the scenario is not so complex as to require the authoring and structuring of an un-manageable amount of content. For example; if each branch has three options/choices – as below.
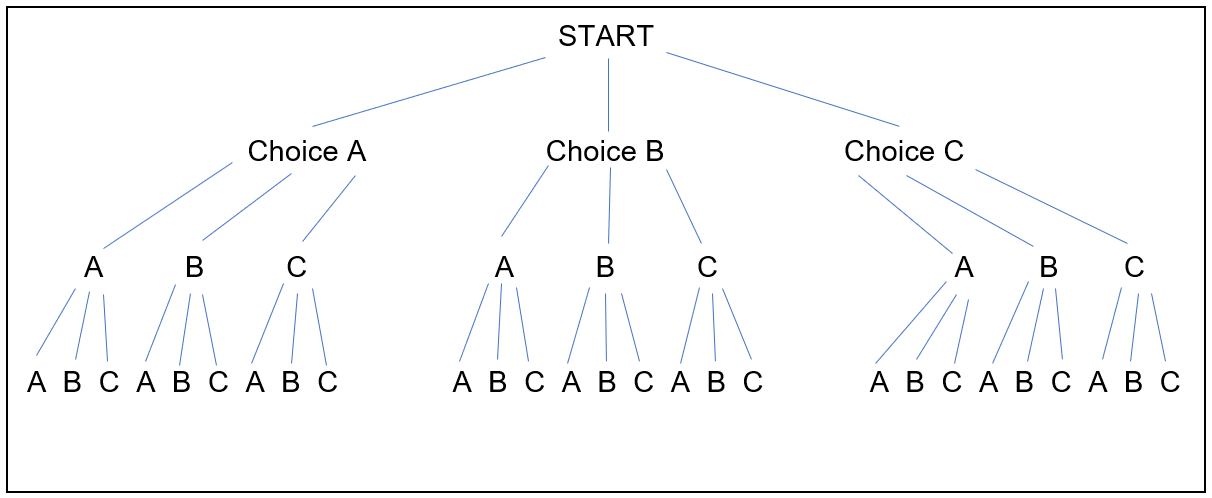
By the time you have moved just three steps into the scenario you will need to have authored 40 individual items of content.
Storyboarding the content
An important part of the design phase is to have an accurate mapping of the content prior to creating the PowerPoint resource; in particular, having an accurate mapping of which slide each of the decision choices links to.

A storyboard template can help with the process of scripting and mapping the scenario. It is possible to create the scenario directly into PowerPoint (albeit more difficult to keep track of where the various choice links need to connect to in the slide deck). Both methods are detailed below.
Using a storyboarding template
Click here to download a blank copy of a storyboard template – as used below.
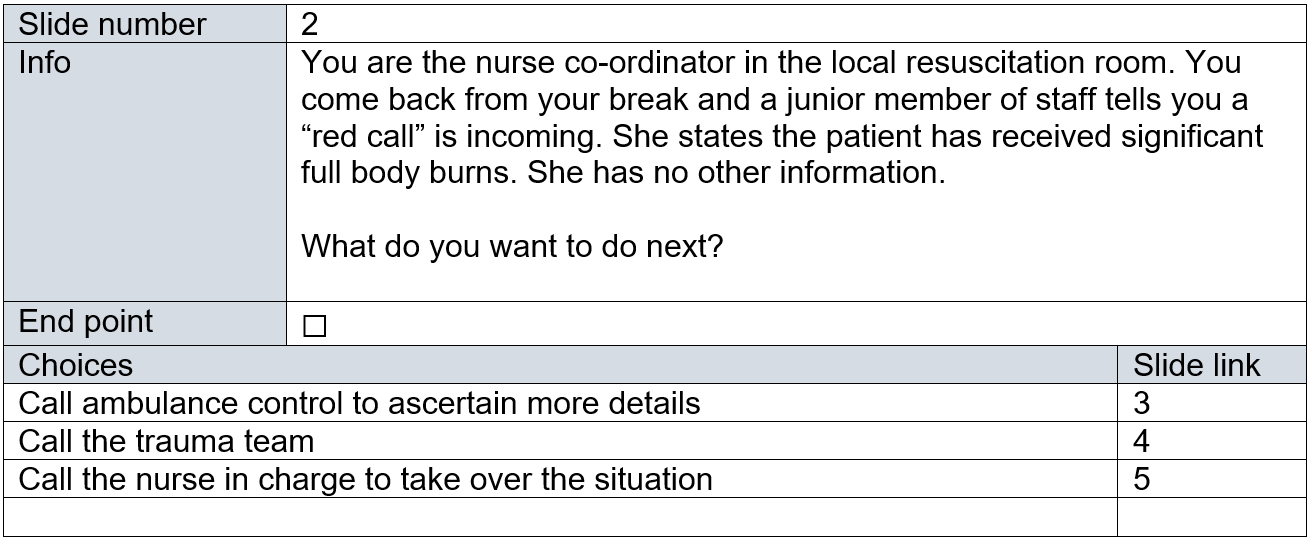
Slide number – this is the number of the slide in your PowerPoint deck.
Info – this is the narrative information about the situation.
End point – indicates that there are no choices on this slide (i.e. it is the end point of a decision branch).
Choices – these are the clickable options that function as links to other slides in the PowerPoint deck.
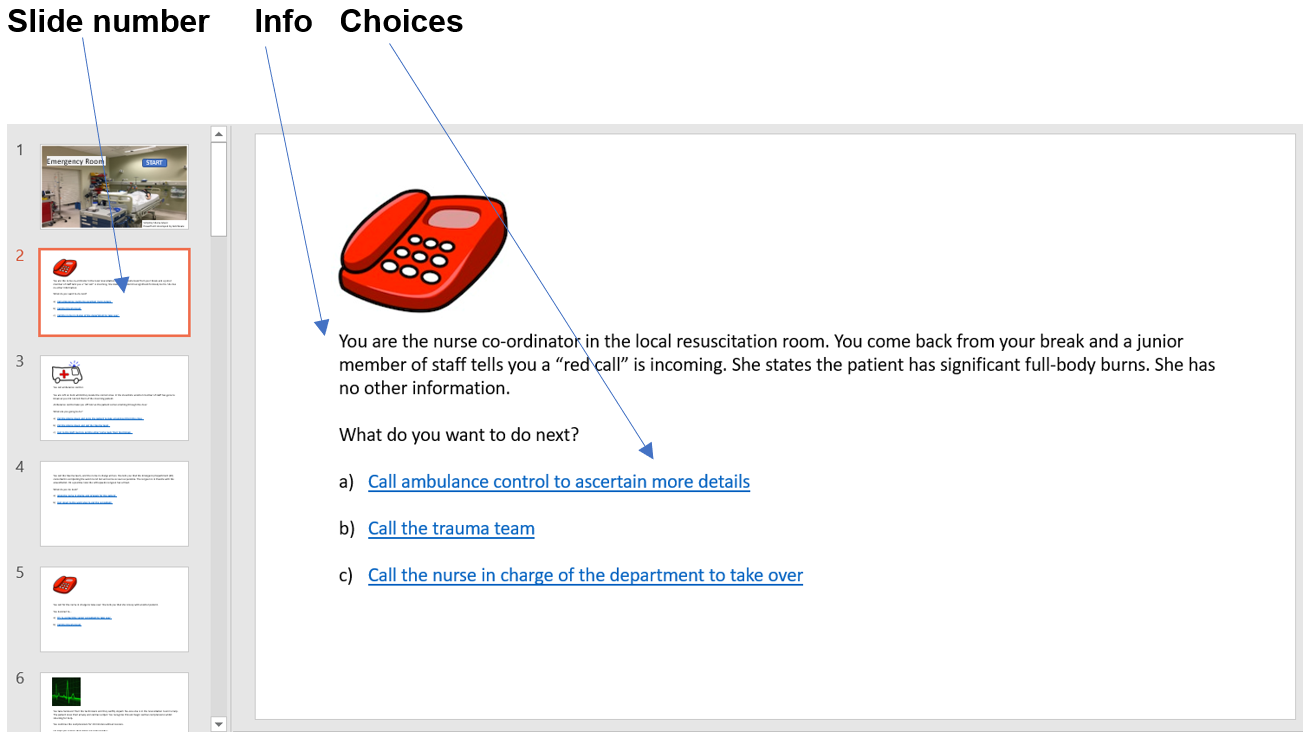
Here is what the template information relates to on a PowerPoint slide.
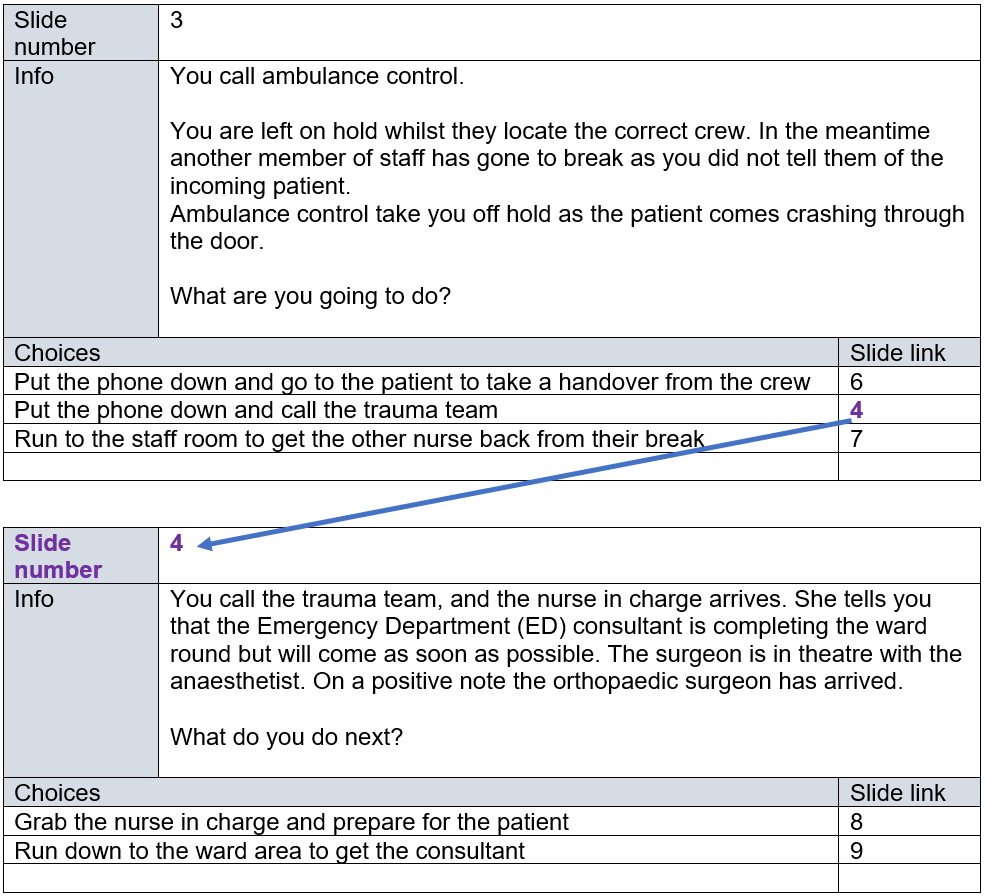
You should map out your scenario fully using multiple templates – one for each slide. In the example below, notice how slide number 4 is indicated as a link from one of the choices on slide number 3.
Creating the resource directly in PowerPoint
Click here to download an example branching scenario PowerPoint file.
The key to this method is keeping an accurate track of which slides the decision links point to. In this example it is clearly indicated which slide each choice will link to.
If using the direct to PowerPoint method, it is recommended that the entire deck of slides is created first, before any active hyperlinks are added. Once all the slides have been created the links can be activated and the text indicating which link the choice should point to can be deleted (don’t forget to do this!)
Creating the resource in PowerPoint
There is no special technical skill required to create this type of branching scenario resource in PowerPoint.
New slides can be added using the New Slide option.

Text can be added using a standard text box.
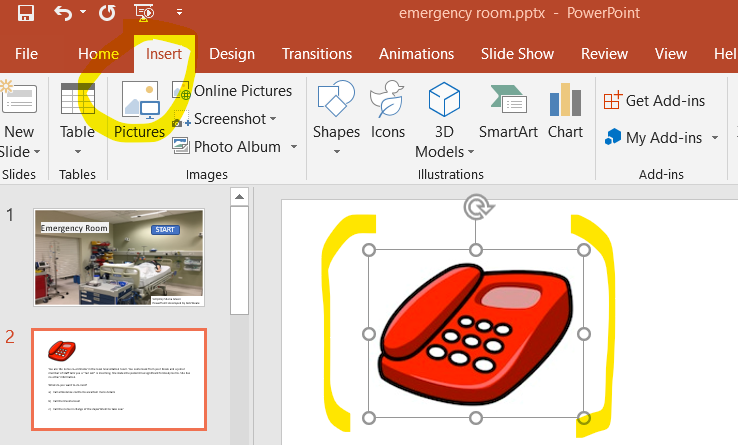
Images can be added using the Insert > Pictures option.
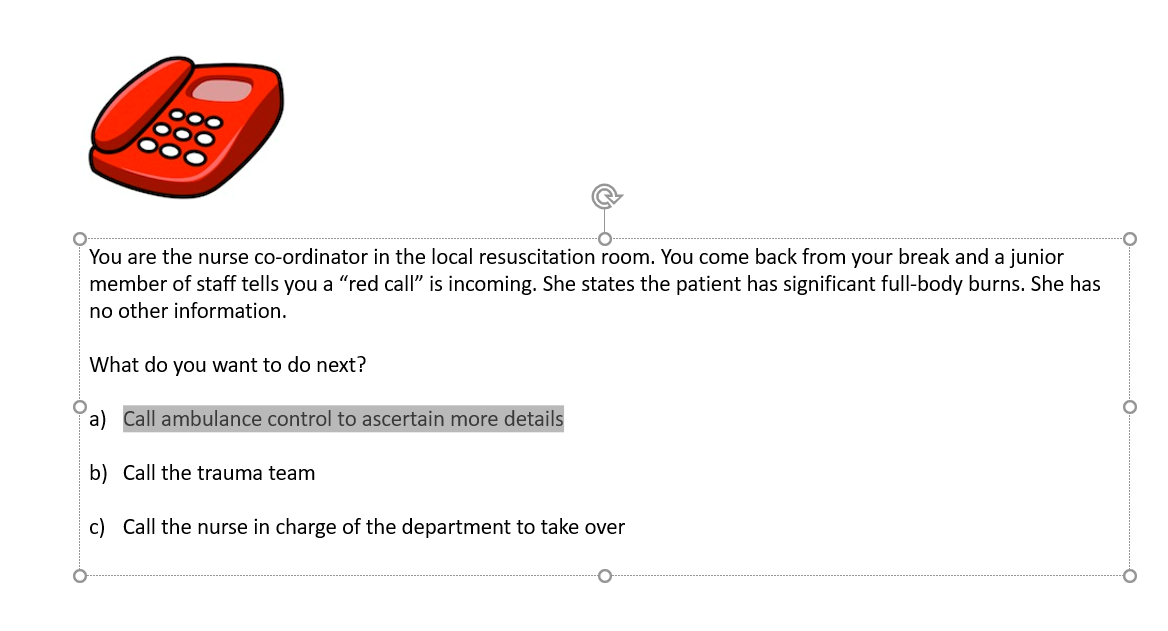
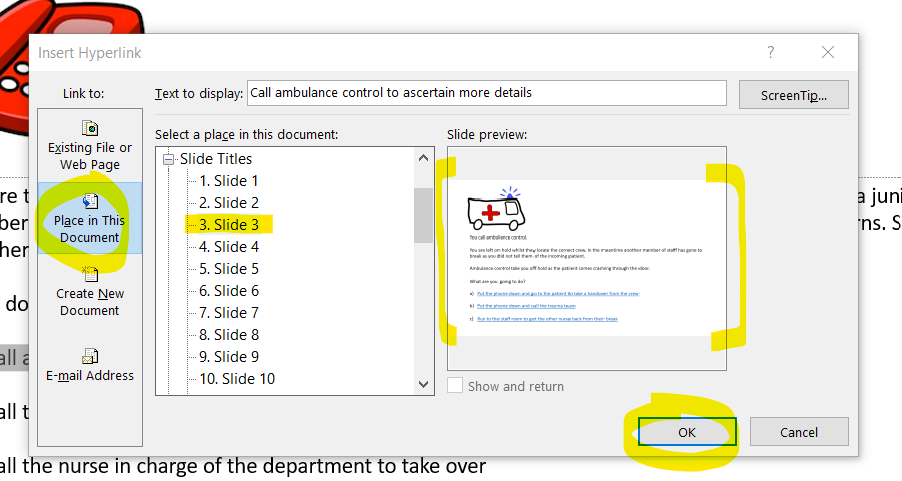
To create a choice link to another slide – highlight the text that you want to turn into a link.
Click the Insert tab and click Link.
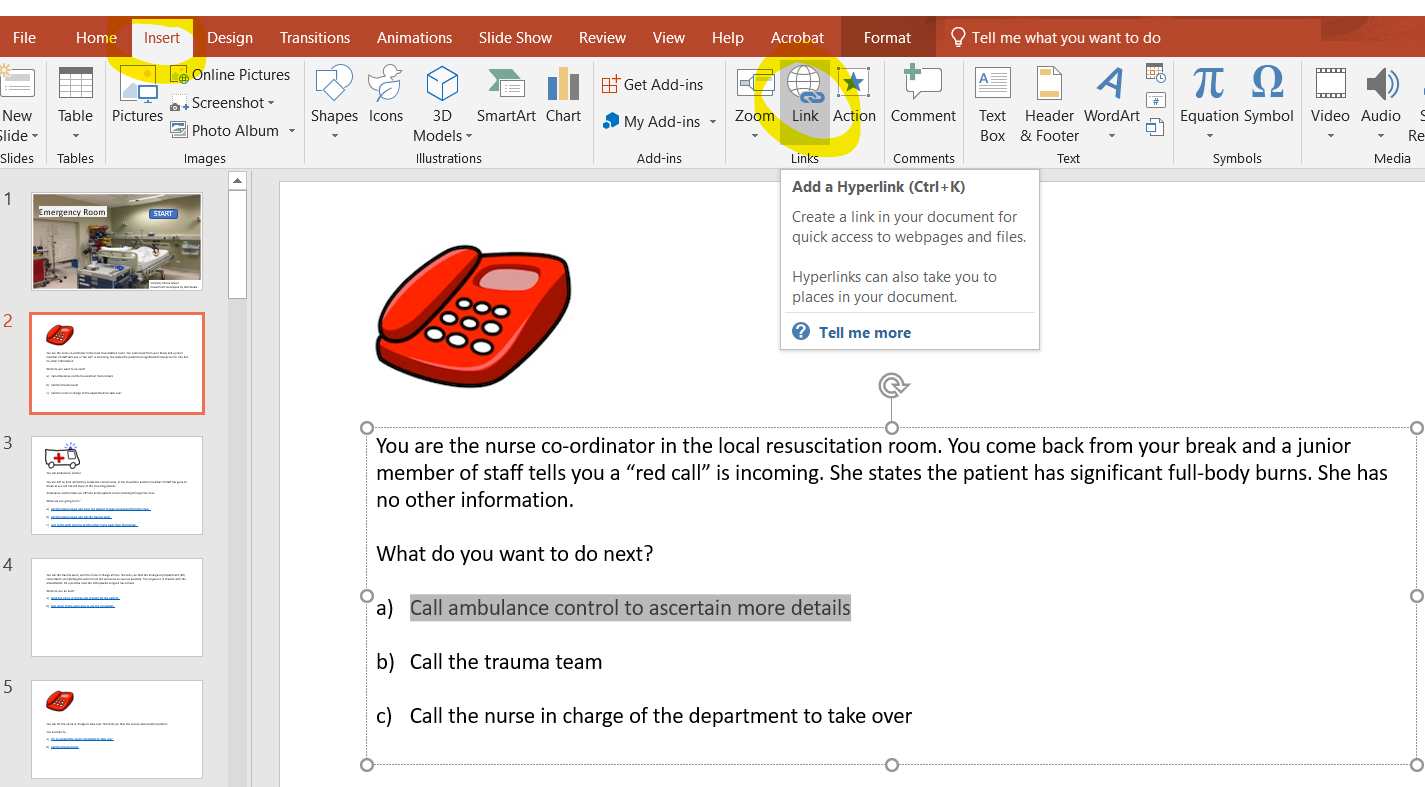
Change the Link to option to: Place in this document.
Select the slide you want to link to, e.g. Slide 3.
You will see a preview of the slide that you have selected to link to.
Click OK to create the link.
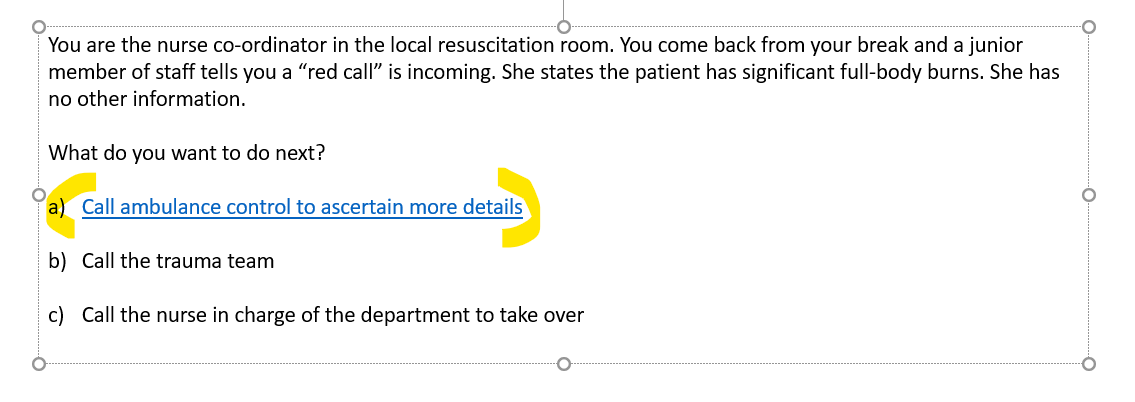
The choice text will change to a link.
When you have completed your branching scenario it is important that you test it to ensure that all of the decision links point to the correct content.
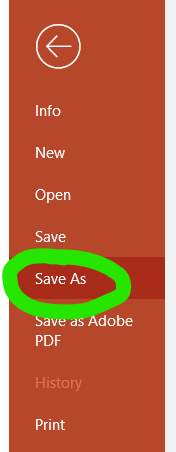
When you are satisfied that the resource is finished:
1. Save it as a standard PowerPoint file (.pptx) this is what you will use should you need to edit the resource.
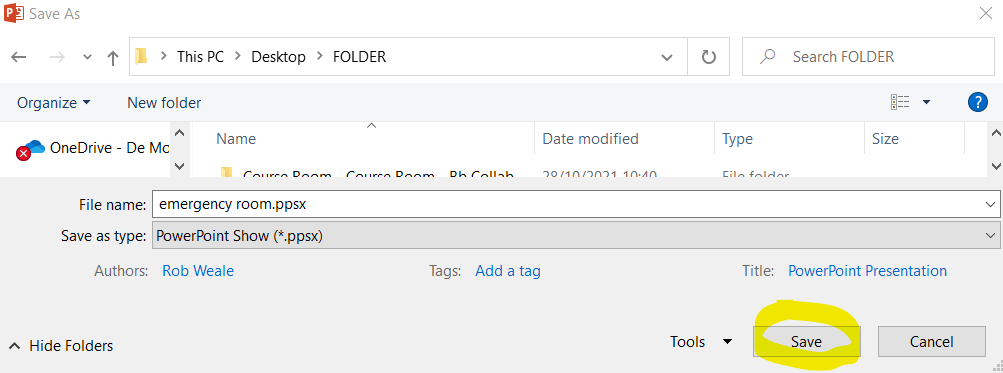
2. Save it as a PowerPoint Show file (.ppsx) – this is the file that you will use to share the resource with learners. A PowerPoint Show file prevents the learners from being able to edit the resource in PowerPoint when they download it. You must share the resource with learners as a PowerPoint show file otherwise it will not function.
a. Choose the Save As option
b. Go into the Save as type menu and select PowerPoint Show (.ppsx)
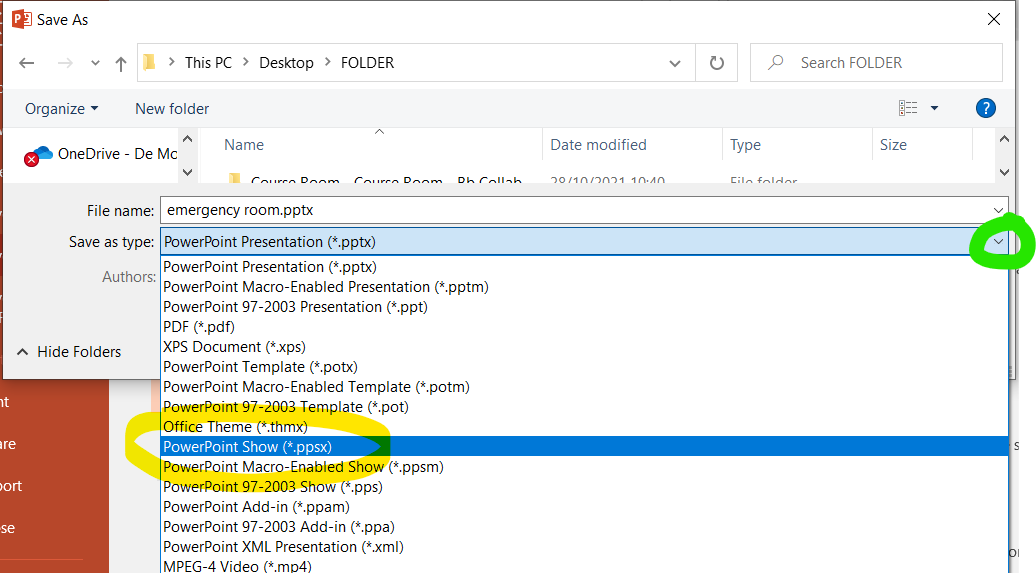
c. Click Save
A PowerPoint show file can be shared with learners in exactly the same way as you would share a standard PowerPoint presentation file.