
Sharing documents using the File tab in a live MS Teams session

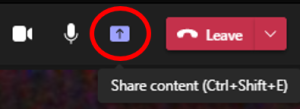
By using Share Content in an MS Teams meeting it is possible to share your screen, a window, a PowerPoint presentation or a whiteboard. But have you considered sharing documents such as a Word document or a spreadsheet?
Sharing documents enables students and staff to collaborate in a document simultaneously e.g. filling in a table that you have designed, completing a crossword, a SWOT analysis, a spreadsheet, co-editing a text, co-authoring a text.
Previously we looked at Sharing documents from OneDrive in a live session. But it is also possible to share documents stored under the Files tab in Teams. All meetings have a Files tab from where documents can be shared (this is similar to the way in which files can be shared within a Team channel). Documents created in Word, Excel, PowerPoint or Class notebooks can all be shared.
Adding a document to the Files tab of a meeting
STEP 1
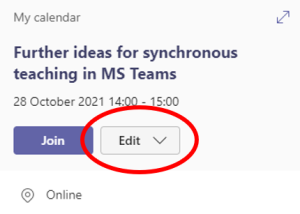
From your Teams calendar select the meeting and click Edit (Do not click ‘Join’). Alternatively, you can just double-click on the meeting.
STEP 2
Select the Files tab:

STEP 3
Once the files tab is selected, you can simply drag and drop documents into the files area from a folder or from your OneDrive:
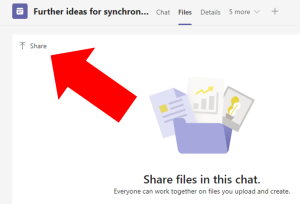
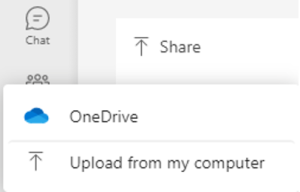
Alternatively, you can use the ‘Share’ option. First click ‘Share:
After clicking the ‘Share’ option, a pop-up menu appears offering the options of selecting from your OneDrive account or Upload from your PC:
Once you have uploaded your files for sharing, they will appear listed under your Files tab as shown in the example below:
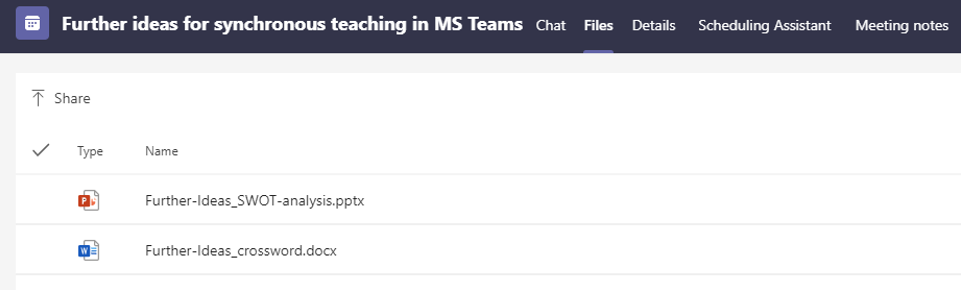
The two documents shown above are now available to any invited attendees of the meeting. (Note that in this example, the PowerPoint file is shared from OneDrive (so is also available via OneDrive) and the Word document copied from a folder on a PC).
Sharing the documents during the meeting
Once your Teams meeting or teaching session has begun, you can share one of these documents with your students by providing a link to the document in the Chat panel. To do this:
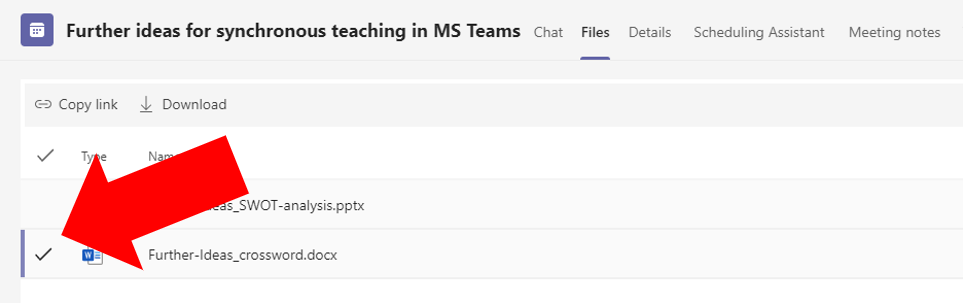
STEP 1
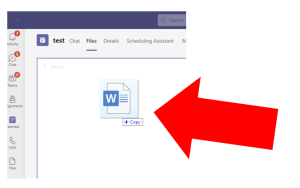
Select the document in your Files tab:
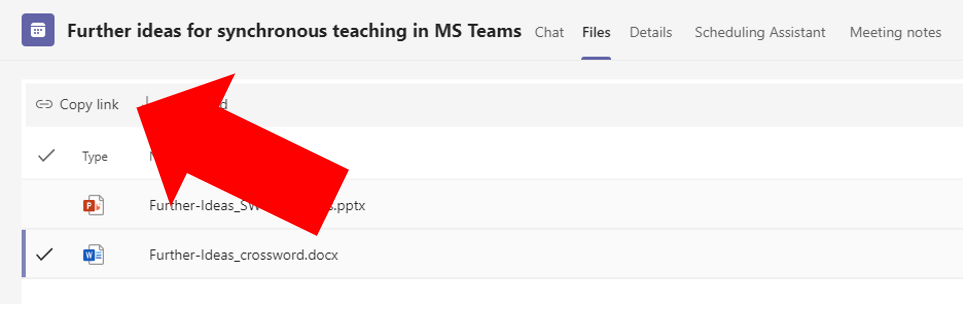
STEP 2
Click the ‘Copy link’ button.
STEP 3
A dialog box will appear as below. By default, ‘People with existing access can use the link’ is often the initial setting for sharing files. You will need to amend this to enable your students to edit the document.
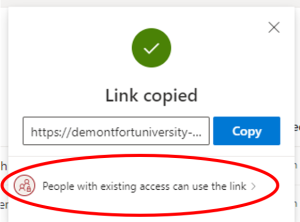
To enable other students to access the document, click where it states “People with existing access can use the link” (see above) and then a menu of alternative sharing options will appear, as shown below:
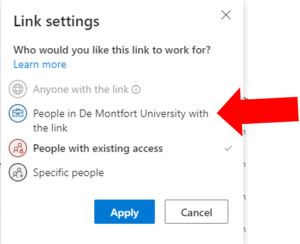
You need to select the ‘People in De Montfort University with the link’ option. (If an ‘Allow editing’ box appears at the bottom of the menu, ensure this is ticked also). Then click the ‘Apply’ button. A ‘Copy’ dialog box will then appear:
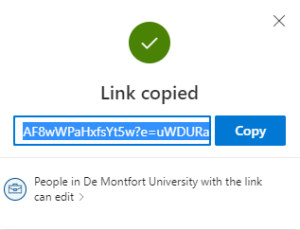
You can now click ‘Copy’.
STEP 4
In your MS Teams meeting, paste the link to the file into a message in the Chat pane, and post the message:
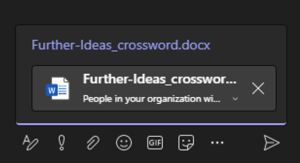
Students can now read the Chat message and click on the link to open the file. You and your students can now edit and collaborate in the document simultaneously.
A note regarding collaborating using Office 365 apps
Office 365 apps are unable to use all the features and functions of the full MS Office applications. For example, multiple columns are not available in the Office 365 version of Word. Because of this, content can be pushed below other content instead of lining up alongside. Therefore, if you intend sharing a document, first check to see how it opens when you share it in Office 365 before you use it in a live session. You may find you need to adjust or simplify the formatting if it does not look how you expect it to.
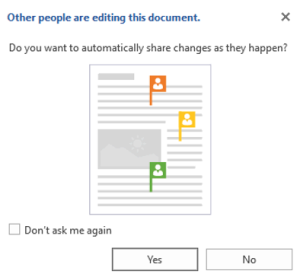
If you want your students to collaborate on the shared document ask them not to download it as this will save a copy to their device. However, the students are able to open a shared document in the browser or Open in Desktop App. If a student does open the document in the Desktop app, ask them to agree to share changes otherwise they will not see the changes their peers make in real time.
Please be aware that currently, ’Guests’ cannot access a file shared via Chat so if you have external ‘Guest’ users they will not be able to open files shared this way. However they can share files if those files have been added to a Teams channel.
More advice is available about Facilitating a live session (synchronous) using Microsoft Teams – CELT Hub (dmu.ac.uk) and Online Teaching and Learning Office 365 Toolkit (sharepoint.com).
Banner photo by Markus Winkler from Pexels. Screenshots used with permission from Microsoft.