
Sharing documents from OneDrive in a live session

You can share documents (Word, PPT, Excel etc) with your students during a live teaching session. This enables simultaneous group collaboration e.g. editing a document, filling in a table or spreadsheet, or SWOT analysis etc.
STEP 1
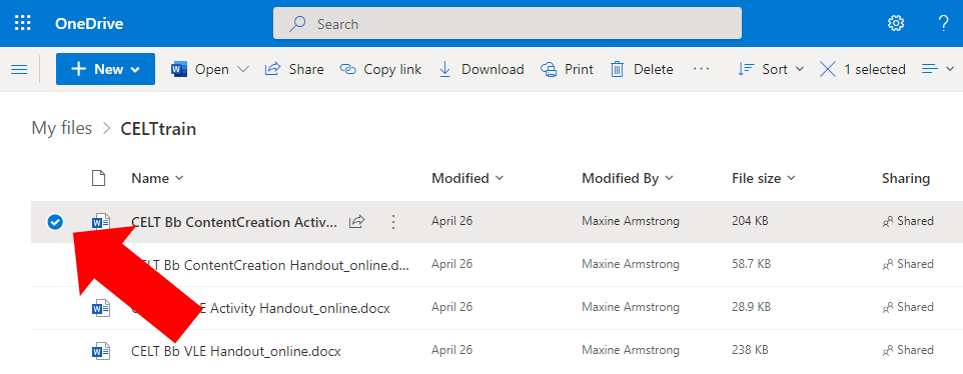
In your OneDrive, click to select the document you wish to share:
STEP 2
A ‘Copy link’ option will then appear at the top of your list of files and folders. Click this Copy link button:

STEP 3
The default setting for sharing OneDrive files is often ‘People with existing access can use the link’:
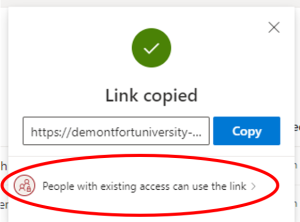
You will need to amend this to enable your students to edit one of your OneDrive documents. To do so, click where it states “People with existing access can use the link” (see above). When you do so, a menu of alternative sharing options will appear as shown below:
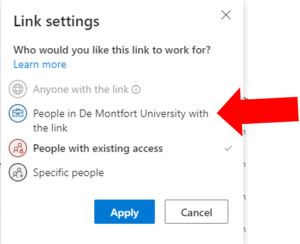
You need to click to select the ‘People in De Montfort University with the link’ option. (If an ‘Allow editing’ box appears at the bottom of the menu, ensure this is ticked also).
Then click ‘Apply’. When you do so, the ‘Link copied’ pop-up box will appear as shown in STEP 4, below.
STEP 4
In the ‘Link copied’ pop-up box, click the ‘Copy’ button:
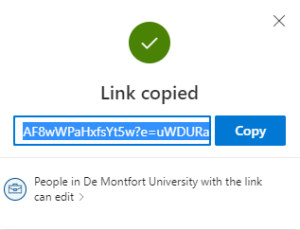
You can now paste and share this link to your OneDrive document with students in a live session via the Chat panel. Students will then be able to instantly collaborate in the document.
More advice is available about Facilitating a live session (synchronous) using Microsoft Teams – CELT Hub (dmu.ac.uk) and Online Teaching and Learning Office 365 Toolkit (sharepoint.com).
Banner photo by Markus Winkler from Pexels. Screenshots used with permission from Microsoft.